Friday, September 9, 2011

Working on the Booth


I have been a busy little bee working away on my booth at Summer Hill Antiques.
My cabinets n bookcases are painted
and vintage wallpaper is being added to the backs for some pop.

Here's a little bookcase that was an icky orangish brown
when I found it at an auction for $2.50.


The bookcase was primed
then painted with three coats of a lovely blue.
The vintage wallpaper was applied with glue spray.

How lucky that the leftover paint and found wallpaper matched so well!

I will share photos of my furnished booth soon.
Today I forgot the staples used to attach the paper to some of the cabinets,
so some have yet to be finished.


Here are a few photos of my booth after I'd thrown in the towel for the day
and packed up my toys to head home.

This chair is so super comfy and it has wonderful construction.
Teals, blues, and golds can be found in the upholstery.
It's a lovely vintage piece.


Here's a photo of the wooden desk I shared last week.
Next to it is the mate to the chair above
and a lovely oil painting.
The painting has a small tear,
but I'm hoping someone adopts it who can patch it up properly


Here's one of the old trunks I scored at an auction.
There are four of them in total.
Now to figure out just where to place them.


I know it's really orange,
but I love this chair.


Of course, I'd love it more in another color.
I was thinking of redoing the chair myself,
but I have three more of these hanging out in the garage
and thought someone else might like the original upholstery.

My lovely boyfriend dug these out of his basement for my booth.
I love the blues and turquoise.


Tomorrow I get to spend all day working at Summer Hill Antiques.
I enjoy spending time there.
The people are so very friendly and make you feel very much at home.
I also enjoy meeting the customers that come in.

So tomorrow I will be splattered with paint, dirty, and maybe a little sore,
but my booth should look tons better.


The Old Block House


Making

The DIY Show Off


The Graphics Fairy
Making Monday Marvelous Linky Party
Simpsonized CraftsAltar'd Furniture Creations Blog

Photobucket
  Keeping It SimpleOrganize with Sandy
  http://linesacrossmyface.blogspot.com/search/label/the%20Cure%20for%20the%20Common%20Monday 
southern hospitality                              

If I've missed any Monday parties,
please email me the button code.

Thank you!


Photobucket

Monday, August 29, 2011

Cabinet Doors to Chalk Boards


 I have been so wanting to try making chalk boards.


Weeks ago, I picked up some cabinet doors at the flea market for a dollar.

They were all in great shape, but were all a little dusty.

I figured with a little sandpaper,
some paint,
and a coat of wax
the chalkboards would be a fun project


To knock off all the varnish and quite a bit of the color,
I attacked the cabinets with some rough 60 grit paper.

Under the slick exterior lurked what resembled a barn red.

As Fall is fast coming
I thought it might be nice to have some barn red chalkboards in my booth.


Amazing what you find with a little sanding.

In the center of the doors, three coats of chalk board paint were applied.
The paint was sanded with 150 grit paper in between coats.


After the paint was dry,
I rubbed a clear wax into the frame.

The wax made the color richer and deeper.


See my photo prop (the crate)
actually being used to prop up the board?


I love that butterfly bush.
It's been so beautiful this summer.
Want to see the difference in the frames that were waxed and unwaxed?
The difference is much more noticeable in the close up on the right.

I was quite happy with how these turned out
and made eight of them.

The total cost was about $12.

One more door still had to be given it's lick of paint.
This door was different from the others.
It was part of a pile of $2 "junk" that came home from an auction.


Originally, the intention was to paint the frame.  I was thinking to paint, distress, wax, much as has been done on my furniture lately.  After seeing the lovely wood underneath the stain, I thought a coat of stain would be a nice alternative to painting.  The stain is cherry and contrasts quite nicely with the chalkboard. 

A few of the chalk boards still new a small finishing touch,
then it's off to the next project.
I hear them calling me.
The Old Block House

Wednesday, August 24, 2011

Before and After Sewing Table

A former coworker of mine manages a local thrift store.
She has taken my oldest under her wing a bit.

She lets him hang out and work on things.
He fixes her computer alot.
She and her husband feed him cheeseburgers and soda.

He loves it.
It's nice to know that he has a place to hang out
where I don't have to worry about
where he is
what he's doing
or who he's with.

Those are things that I've had plenty to worry over during his early teen years.

Sometimes my son brings me home treasures,
but this one I found while stopping in to drop off a snack.


I thought it was just a little bench,
needing a bit of paint and a square of fabric.


You can see it definitely needed something.

Not until our trip to Hannibal and shopping through the antique stores
did I know why the table had a lift off top.

It's a sewing table.

The top comes off and you can fill the inside
with your spools, needles, thread,
and whatever else you'd like to stash.


My boys would have hidden so many things in there when they were little.
I was always finding "little guys" hidden in the freezer, cabinets, drawers.

The table has now been given a coat of barn red paint.
This was topped with clear wax mixed with  black and brown umber paints.
I just stir up the wax in an old coffee cup with the paint until it's all nice and mooshy.
Then apply and buff.


After I'd already painted the table,
I found fabric on clearance for $3/yd.
The table top needed about 75 cents worth of fabric.
The table was free.
The paint and wax were about $2.

So my little sewing table costs under $3.


I really like this little table,
especially after finding that the top lifts off for a reason.

The things I could stash in there,
but the table is off to my booth,
which is filled to the brim.

I get to move into a second booth on the first,
or perhaps a few days early if I'm lucky before Labor Day weekend.

I love what I do!


Fall is here and I'm ready to dive right into it
 
I can't wait to hop into that first huge pile of leaves


Tuesday, August 23, 2011

Vintage Fabric Remnant

Last week I told you here about this wonderful chair that I scored at an auction.

She's a little sad, been beat up, neglected,
but she's still got hope that it's gonna get better.

And it shall.
Soon.
Very soon.


I've been considering just what material to use to reupholster the seat.
I've seen some wonderful bright and fun patterns on chairs lately.
I've seen neutrals in the form of burlap and drop cloth.
I've seen some gorgeous vintage grain sacks.


Last night I had ten minutes to kill,
so I dropped in the flea market.

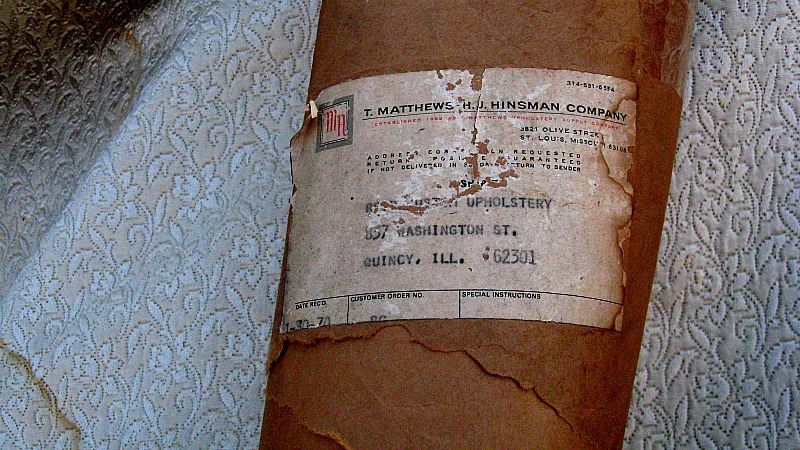
A long roll of vintage upholstery fabric was leaning against the wall.

They were only asking $5.

How could I not buy it?


One of the ends has some water staining.

I'll probably take the stained pieces and soak them in some strong coffee.


 The usable fabric measure about 3'x6',
which means I'll get tons of use out of it.


This will be incredible to cover my chair seat.

The label shows that it was mailed in January of 1970.


I love this fabric and am thinking of using it on the set of dining chairs that need recovered, or maybe on the cane chairs, or perhaps on a bench. 

Lots of projects to do and never enough time!


The Old Block House


Photobucket

Friday, August 19, 2011

French Chair and Grain Sacks

I've been so incredibly inspired by many wonderful bloggers.
They've inspired me to tackle projects that I used to believe were impossible.
They've inspired me to take chances with restyling furniture, home decor, and thrifting.

Recently, at an auction, I purchased a set of 5 or 6 chairs for $2.50.
$2.50 total, not per piece, but for the lot.

The chairs were not in the best of shape.
None of them matched.
The chairs were actually a bit scary,
but I knew they needed love.

This is the chair that inspired me to bid.


She needs lots and lots of work.
Paint.
Upholstery.
Love.


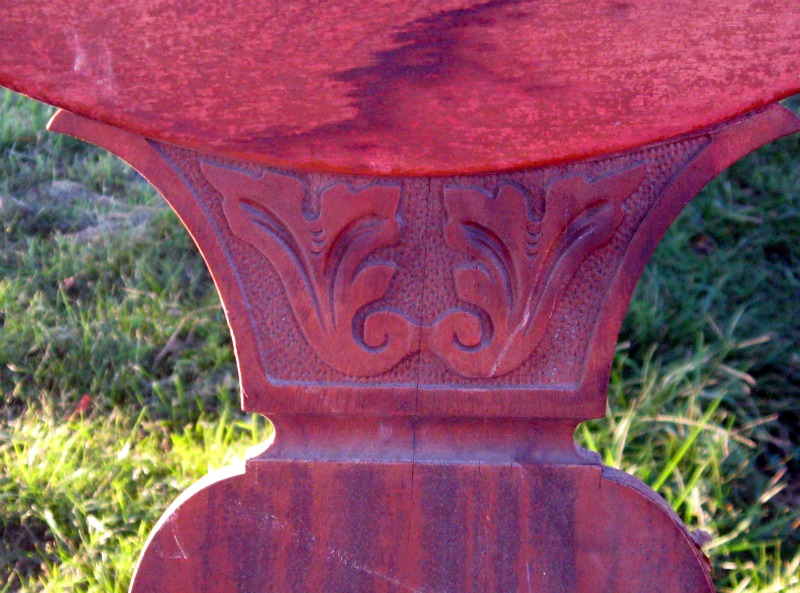
I love the detailing in the wood.


The seat cushion is all lumpy and bumpy.

Did I mention it smells?
Not terribly,
just a little.

I've been wanting to tackle this project
and hope to begin next Monday.

There are gorgeous chairs being reloved
using old feed sacks for upholstery fabric.
I was hoping to find some at an auction.
I did find a few,
but they're either too rough looking or not the right size.


The last two photos are of the same bag, just reverse sides.

A reader emailed about buying one of the sacks, which is wonderful.
Anytime I post something that you'd like to purchase, please feel free to email me.
Many items end up in either my online shop or booth at the mall.
theoldblockhouse@hotmail.com
I always love to get emails.

I did find these cute seed sample sacks.

The Old Block House

The sacks measure 6.5" x 10.5".

I'm still wondering just what to do with these.
There are probably four dozen of the bags.
Some were put in my Etsy shop,
but I'm keeping a few for myself.

Aren't they just the cutest little grain sacks?
 
Fall is here and I'm ready to dive right into it
 
I can't wait to hop into that first huge pile of leaves

Wednesday, August 17, 2011

Wordless Wednesday Mark Twain Riverboat Hannibal Missouri


 Mark Twain Riverboat Hannibal Missouri

View down the river from Hannibal

View up the river from Hannibal


 Lighthouse of the Widow "Douglas"


Missouri side of the river


Lover's Leap


Train running alongside the Mississippi


"Jackson" Island in Mark Twain's writings
Mark Twain and his friends would raft out to the island for camping and shenanigans.

The Old Block House
Related Posts Plugin for WordPress, Blogger...